react-native-devtools-spy
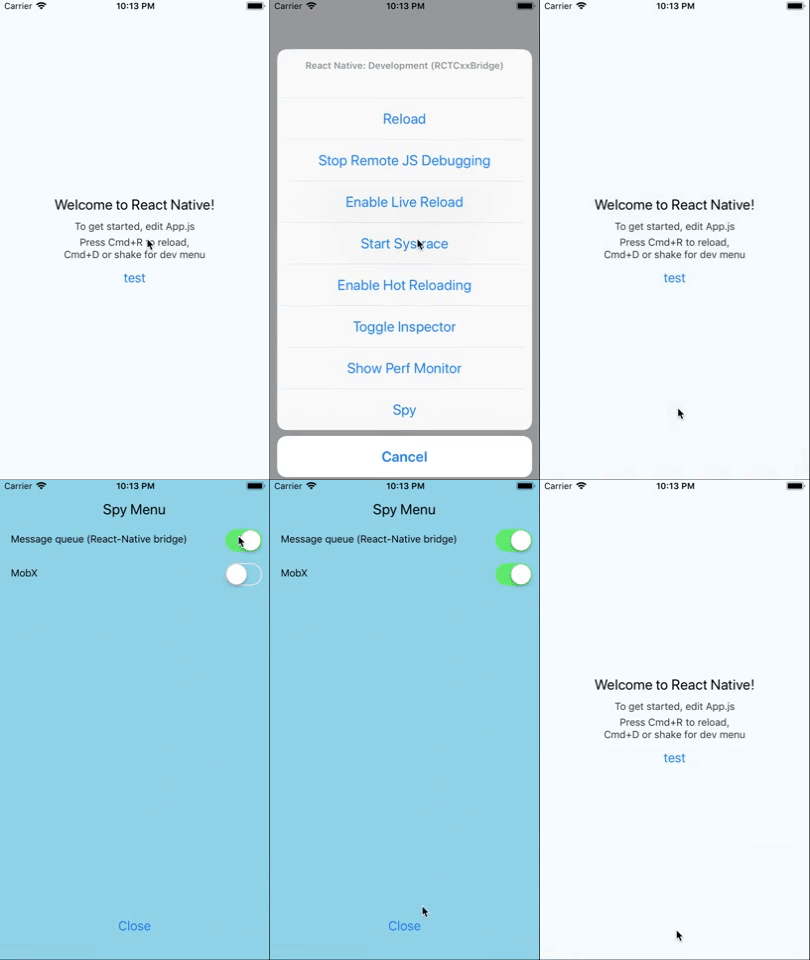
Add this package to your react native project to get an extra "Spy" development menu option. Clicking the "Spy" button will turn on extra logs:
- All MessageQueue messages (messages going over the javascript <-> native bridge).
- All MobX events.
Getting started
$ npm install react-native-devtools-spy --save
Mostly automatic installation
$ react-native link react-native-devtools-spy
Manual installation
Android
- Open up
android/app/src/main/java/[...]/MainActivity.java
- Add
import com.reactlibrary.devtools.spy.SpyOptionsHandler;to the imports at the top of the file - Add
import android.os.Bundle;to the imports at the top of the file - Add the following lines to the
onCreatemethod:
protected void onCreate(Bundle savedInstanceState) {
      super.onCreate(savedInstanceState);
      if (BuildConfig.DEBUG) {
          getReactInstanceManager().getDevSupportManager()
                  .addCustomDevOption("Spy",
                          new SpyOptionsHandler(
                                  getReactInstanceManager()));
      }
  }
- Append the following lines to
android/settings.gradle:include ':react-native-devtools-spy' project(':react-native-devtools-spy').projectDir = new File(rootProject.projectDir, '../node_modules/react-native-devtools-spy/android') - Insert the following lines inside the dependencies block in
android/app/build.gradle:compile project(':react-native-devtools-spy')
iOS
- In XCode, in the project navigator, right click
Libraries➜Add Files to [your project's name] - Go to
node_modules➜react-native-devtools-spyand addRNDevToolsSpy.xcodeproj - In XCode, in the project navigator, select your project. Add
libRNDevToolsSpy.ato your project'sBuild Phases➜Link Binary With Libraries - Run your project (
Cmd+R)<
Usage
Add the DevToolsSpy component to your view hierarchy:
import DevToolsSpy from 'react-native-devtools-spy';
...
render() {
    return (
      <View>
          {__DEV__ ? <DevToolsSpy /> : null}
      </View>
    );
  }
Run your application and open the development menu (shake/cmd+d/cmd+m).
Click on the "Spy" menu item.
Toggle the "Message queue" button.
In the console logs you will see the extra logs of all messages going over the native <-> javascript bridge, as such:
N->JS : RCTEventEmitter.receiveTouches(["topTouchStart",[{"target":9,"locationX":62.5,"pageY":389,"force":0,"locationY":22,"pageX":197,"identifier":1,"timestamp":190140621.128411}],[0]])
JS->N : UIManager.measure([12,33391])
JS->N : NativeAnimatedModule.createAnimatedNode([3,{"type":"value","value":1,"offset":0}])
JS->N : NativeAnimatedModule.createAnimatedNode([2,{"type":"style","style":{"opacity":3}}])
If you are using MobX inyour project also toggle the "MobX" button to log all MobX events, as such:
[MobX] {type: "update", object: {…}, oldValue: 1517169620887, name: "text1", newValue: 1517169740502, …}
[MobX] {object: Reaction, type: "scheduled-reaction"}
[MobX] {spyReportEnd: true}
[MobX] {object: Reaction, type: "reaction", fn: ƒ, spyReportStart: true}
[MobX] {time: 3, spyReportEnd: true}
