react-native-tutorial
Build real native simple application with javascript.
How to run
Project sources: Examples/show-me-the-coin
cd Examples/show-me-the-coin
yarn # Install dependencies
yarn start # Start expo
Getting Started
1. Create a New Project in Expo XDE
expo-cli install (https://docs.expo.io/versions/latest/introduction/installation/)
npm install -g expo-cli
Expo CLI is a tool for developing apps with Expo. In addition the command-line interface (CLI) it also has a graphical UI, Expo Developer Tools, that pops up in your web browser. With Expo Dev Tools you can quickly set up your test devices, view logs and more.
Create new project
expo init ReactNative-Coin-Tutorial-2019
Choose some options
? Yarn v1.16.0 found. Use Yarn to install dependencies? (Y/n)  y

? Choose a template: (Use arrow keys)
  ----- Managed workflow -----
❯ blank         minimal dependencies to run and an empty root component
  tabs          several example screens and tabs using react-navigation
  ----- Bare workflow -----
  bare-minimum  minimal setup for using unimodules

  And write your app name (It will be used for home screen icon)
- comments may do not work on JSX area.
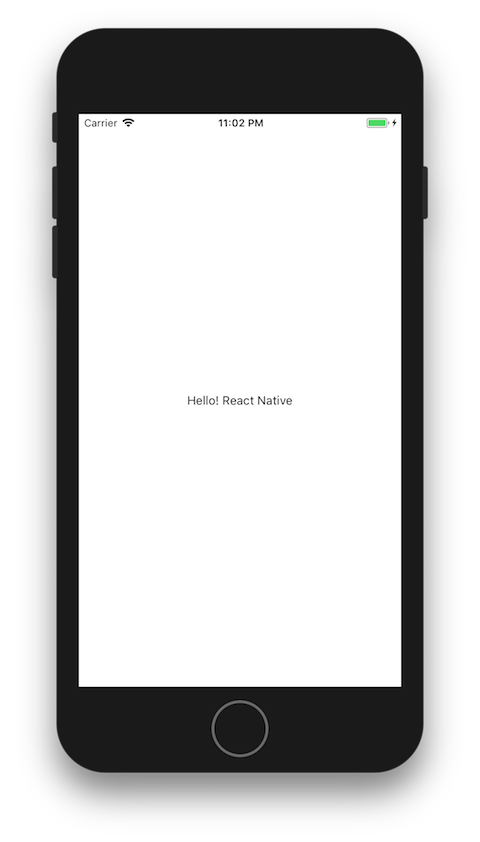
Done. You just made your first react native application.
Look into the code.
App.js
import React from 'react';
import { StyleSheet, Text, View } from 'react-native';

export default class App extends React.Component {
  render() {
    return (
      <View style={styles.container}>
        <Text>Open up App.js to start working on your app!</Text>
      </View>
    );
  }
}

const styles = StyleSheet.create({
  container: {
    flex: 1,
    backgroundColor: '#fff',
    alignItems: 'center',
    justifyContent: 'center',
  },
});
Run and Test!!
- Turn off Live reloading and edit the
Textcomponent in App.js - Turn on Hot reloading and edit the
Textcomponent in App.js

- Change your host in XDE to
LANorlocalhostfor faster
If you are using LAN, make sure your device is on the same wifi network as your development machine. This may not work on some public networks. localhost will not work for iOS unless you are in the simulator, and it only work on Android if your device is connected to your machine via usb.
- Development menus
- Android Simulator:
cmd+m - iOS Simulator:
ctrl+cmd+zorcmd+d - Genymotion(Android):
Menuorcmd+m
- Android Simulator:
2. FlexBox Practice
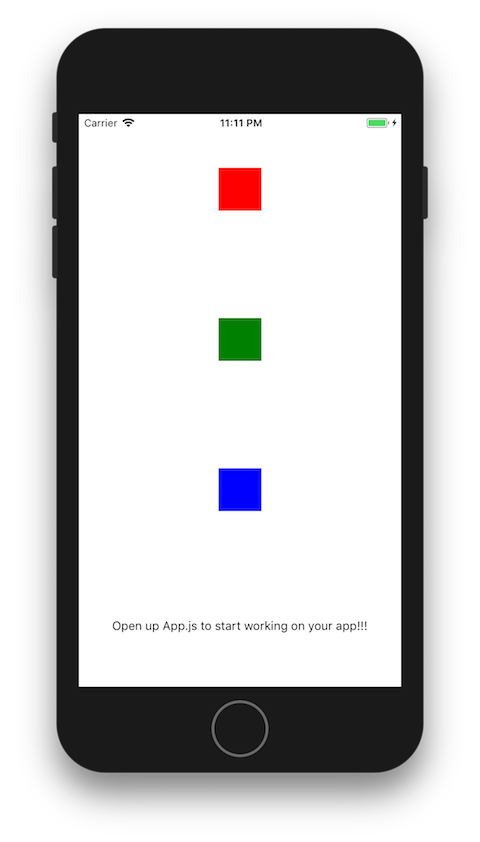
- Change your applicaiton's layouts using Flexbox with
StyleSheet
App.js
import React from 'react';
import { StyleSheet, Text, View } from 'react-native';

export default class App extends React.Component {
  render() {
    return (
      <View style={styles.container}>
        <View style={[styles.box, {backgroundColor: 'red', flex:1}]}></View> { /* Delete flex */ }
        <View style={[styles.box, {backgroundColor: 'violet', flex:2}]}></View> { /* Delete flex */ }
        <View style={[styles.box, {backgroundColor: 'pink', flex:3}]}></View> { /* Delete flex */ }
        <Text>Open up App.js to start working on your app!!!</Text>
      </View>
    );
  }
}

const styles = StyleSheet.create({
  container: {
    flex: 1,
    // flexDirection: 'row',
    backgroundColor: '#fff',
    alignItems: 'center', // edit here
    justifyContent: 'space-around', // edit here using `center, space-around`
  },
  box: {
    backgroundColor: 'blue',
    width: 50,
    height: 50,
  }
});
Run and Test!
- Change each color of
Viewcomponents - Change styles as
backgroundColor,flex,alignItemsandjustifyContent
3. Say Hello to a New Component: CoinView
- Make a new file: 'screens/CoinView.js'
- Write a new component as below
CoinView.js
import React from 'react'
import { StyleSheet, Text, View } from 'react-native';

class CoinView extends React.Component {
  render () {
    return (
      <View style={styles.container}>
        <Text>New View </Text>
      </View>
    )
  }
}

const styles = StyleSheet.create({
  container: {
    flex: 1,
    flexDirection: 'column', // row
    backgroundColor: 'skyblue',
    justifyContent: 'center',
    alignItems: 'center',
  },
});

export default CoinView;
App.js
import React from 'react';
import { StyleSheet, Text, View, SafeAreaView } from 'react-native';
import CoinView from './screens/CoinView'

export default class App extends React.Component {
  render() {
    return (
      <CoinView></CoinView>
    );
  }
}

const styles = StyleSheet.create({
  container: {
    flex: 1,
    backgroundColor: '#fff',
    alignItems: 'center',
    justifyContent: 'center',
  },
});
Run and Test!
4. StatusBar
OMG!! Sometimes your contents are placed under status bar or notch.
So you need to custom StatusBar.
- You can control status bar through
StatusBarcomponent fromreact-nativemodule. - I recommend use
Constantsfromexpo-constantsmodule for status bar's height.
Install expo-constants
npm install expo-constants
App.js
import React from 'react';
import { StyleSheet, Text, View } from 'react-native';
import Constants from 'expo-constants';
import CoinView from './screens/CoinView';

export default class App extends React.Component {
  render() {
    return (
      <View style={styles.container}>
        <View style={styles.statusBar} />
        <CoinView />
      </View>
    );
  }
}

const styles = StyleSheet.create({
  statusBar: {
    backgroundColor: '#C2185B',
    height: Constants.statusBarHeight
  },
  container: {
    flex: 1
  }
});
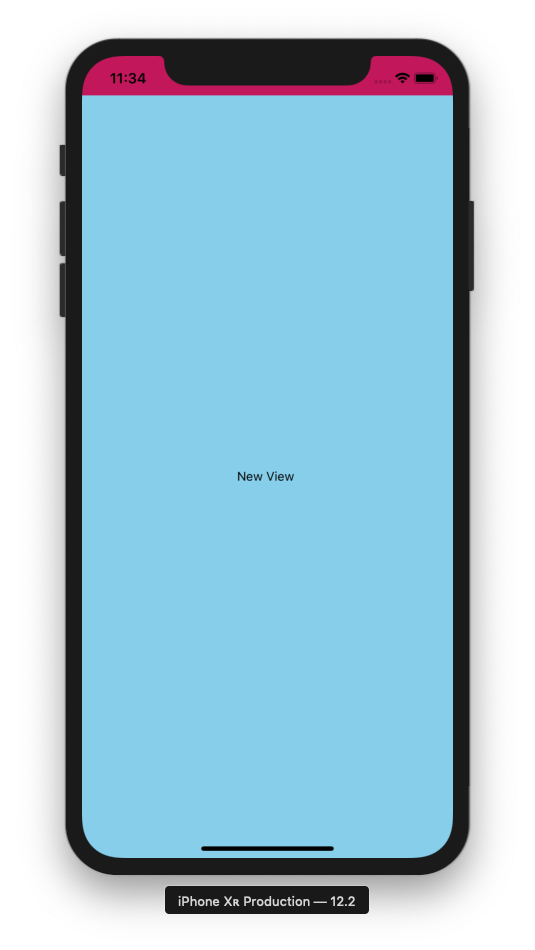
Use expo's constants for set statusbar's height matched devices. (https://docs.expo.io/versions/latest/guides/configuring-statusbar/#place-an-empty-view-on-top-of)
or
StatusBar is the component to control the app status bar. link
Most components can be customized with various parameters called props(properties).
And hidden, backgroundColor and barStyle are StatusBar component's props.
5. Top Bar
- Make another component called
TopBar - You will know how to make components and use
/components/TopBar.js
import React from 'react';
import { StyleSheet, Text, View } from 'react-native';

class TopBar extends React.Component {
  render() {
    return (
      <View style={styles.container}>
        <Text>Left</Text>
        <Text>TopBar</Text>
        <Text>Right</Text>
      </View>
    );
  }
}

const styles = StyleSheet.create({
  container: {
    alignSelf: 'stretch',
    height: 52,
    flexDirection: 'row', // row
    backgroundColor: 'yellow',
    alignItems: 'center',
    justifyContent: 'space-between', // center, space-around
    paddingLeft: 10,
    paddingRight: 10
  }
});

export default TopBar;
Add TopBar in App.js
App.js
import React from 'react';
import { StyleSheet, Text, View } from 'react-native';
import { Constants } from 'expo';
import CoinView from './screens/CoinView';
import TopBar from './components/TopBar';

export default class App extends React.Component {
  render() {
    return (
      <View style={styles.container}>
        <View style={styles.statusBar} />
        <TopBar></TopBar>
        <CoinView />
      </View>
    );
  }
}

const styles = StyleSheet.create({
  statusBar: {
    backgroundColor: '#C2185B',
    height: Constants.statusBarHeight
  },
  container: {
    flex: 1
  }
});
Tada!
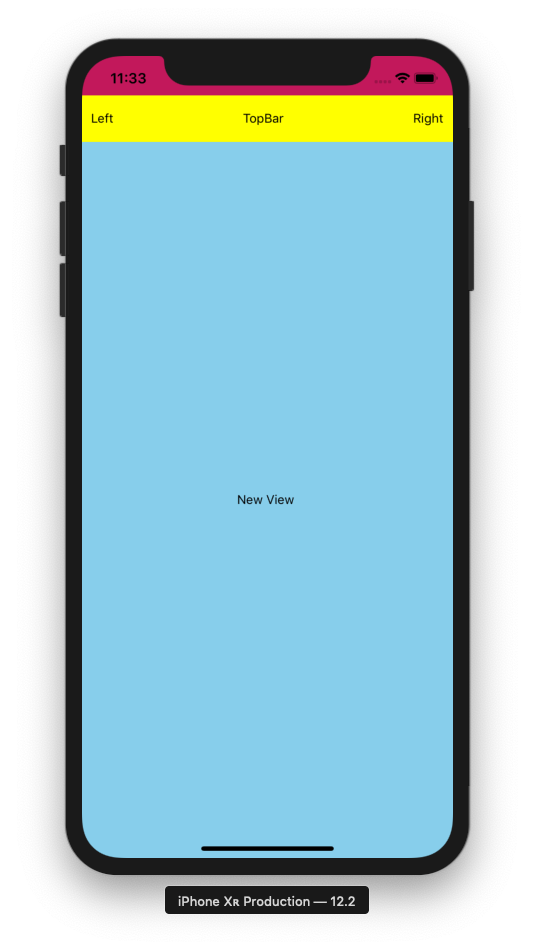
- Why did
TopBaruse onlyheightandCoinViewuseflexboxin the style prop?
6. Props with TopBar Components
-is deleted line+is added line
screens/CoinView.js
class CoinView extends React.Component {
  render() {
    return (
      <View style={[styles.container, this.props.style]}>
        <Text>New Coin View </Text>
      </View>
    );
  }
}
You can apply styles from other parent components.
components/TopBar.js
Ready to apply title from a parent component
return (
        <View style={styles.container}>
          <Text>Left</Text>
 -        <Text>TopBar</Text>
 +        <Text style={{fontSize: 20}}>{this.props.title || 'TITLE'}</Text>
          <Text>Right</Text>
        </View>
      )
App.js
import React from 'react';
import { StyleSheet, Text, View } from 'react-native';
import { Constants } from 'expo';
import CoinView from './screens/CoinView';
import TopBar from './components/TopBar';

export default class App extends React.Component {
  render() {
    return (
      <View style={styles.container}>
        <View style={styles.statusBar} />
        <TopBar title="Show Me The Coin" />
        <CoinView style={styles.coinView} />
      </View>
    );
  }
}

const styles = StyleSheet.create({
  statusBar: {
    backgroundColor: '#C2185B',
    height: Constants.statusBarHeight
  },
  container: {
    flex: 1
  },
  coinView: {
    width: '100%',
    flex: 1,
    flexDirection: 'column', // row
    backgroundColor: 'white',
    alignItems: 'center',
    justifyContent: 'flex-start' // center, space-around
  }
});
7. Brand New CoinItem Component
- Add components/CoinItem.js file
components/CoinItem.js
import React from 'react';
import { StyleSheet, Text, View, Image } from 'react-native';

class CoinItem extends React.Component {
  render() {
    let date = new Date();
    let now = date.toLocaleString();

    return (
      <View style={styles.container}>
        <Image
          style={{ width: 50, height: 50 }}
          source={{ uri: 'https://bitcoin.org/img/icons/opengraph.png' }}
        />
        <Text style={[styles.text, { flex: 1 }]}>
          {this.props.name || 'Name'}
        </Text>
        <Text style={[styles.text, { flex: 1 }]}>
          {'Volume: ' + (this.props.volumn || 0)}
        </Text>
        <Text style={[styles.text, { flex: 1 }]}>
          {'Price: ' + (this.props.price || 0)}
        </Text>
        <Text style={[styles.text, { flex: 1 }]}>
          {'#' + (this.props.rank || 'Rank')}
        </Text>
      </View>
    );
  }
}

const styles = StyleSheet.create({
  container: {
    width: '100%',
    height: 80,
    flexDirection: 'row', // row
    backgroundColor: 'skyblue',
    alignItems: 'center',
    justifyContent: 'space-around', // center, space-around
    marginTop: 5,
    marginBottom: 5
  },
  text: {
    color: 'white'
  }
});

export default CoinItem;
screens/CoinView.js
import React from 'react';
import { StyleSheet, Text, View } from 'react-native';
import CoinItem from '../components/CoinItem';

class CoinView extends React.Component {
  render() {
    return (
      <View style={[styles.container, this.props.style]}>
        <CoinItem></CoinItem>
        <CoinItem></CoinItem>
        <CoinItem></CoinItem>
      </View>
    );
  }
}

const styles = StyleSheet.create({
  container: {
    flex: 1,
    flexDirection: 'column', // row
    backgroundColor: 'skyblue',
    // justifyContent: 'center',
    // alignItems: 'center'
  }
});

export default CoinView;
Run
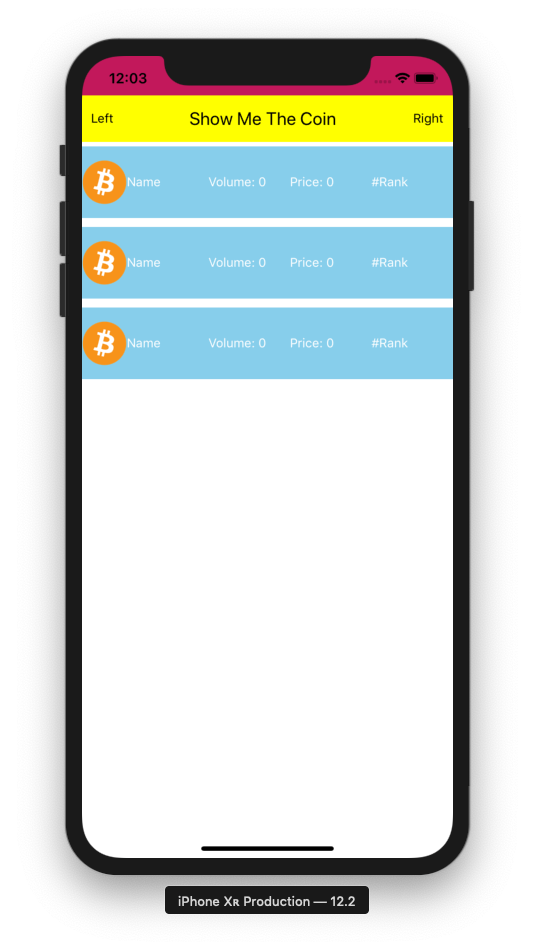
8. Push Dummies Into The CoinItem Component
screens/CoinView.js
Example Data
const sampleData = [
   {
         "id": "bitcoin",
         "name": "Bitcoin",
         "symbol": "BTC",
         "rank": "1",
         "price_usd": "6195.6",
         "price_btc": "1.0",
         "24h_volume_usd": "8119580000.0",
         "market_cap_usd": "103323711420",
         "available_supply": "16676950.0",
         "total_supply": "16676950.0",
         "max_supply": "21000000.0",
         "percent_change_1h": "-1.8",
         "percent_change_24h": "4.19",
         "percent_change_7d": "-15.65",
         "last_updated": "1510556652"
     },
     {
         "id": "ethereum",
         "name": "Ethereum",
         "symbol": "ETH",
         "rank": "2",
         "price_usd": "310.13",
         "price_btc": "0.0493027",
         "24h_volume_usd": "1636680000.0",
         "market_cap_usd": "29678006174.0",
         "available_supply": "95695373.0",
         "total_supply": "95695373.0",
         "max_supply": null,
         "percent_change_1h": "-0.89",
         "percent_change_24h": "1.81",
         "percent_change_7d": "4.39",
         "last_updated": "1510556649"
     },
 ];
Apply data
screens/CoinView.js
class CoinView extends React.Component {
  render() {
    let coinItems = sampleData.map( (data, index) => {
      const {rank, name, price_usd, market_cap_usd, time} = data; // Destructuring
      return (
        <CoinItem
          key={index}
          rank={rank}
          name={name}
          price={price_usd}
          volumn={market_cap_usd}
        />
      );
    });

 /** Same expression with above **/
    // let coinItems = [];

    // for (var i = 0; i < sampleData.length; i++) {
    //   let data = sampleData[i];
    //   let CoinItem = (
    //     <CoinItem
    //       key={data.index}
    //       rank={data.rank}
    //       name={data.name}
    //       price={data.price_usd}
    //       volumn={data.market_cap_usd}
    //     />
    //   )
    //   coinItems.push(CoinItem);
    // }

    return (
      <View style={[styles.container, this.props.style]}>
        {coinItems}
      </View>
    );
  }
}

...
Run
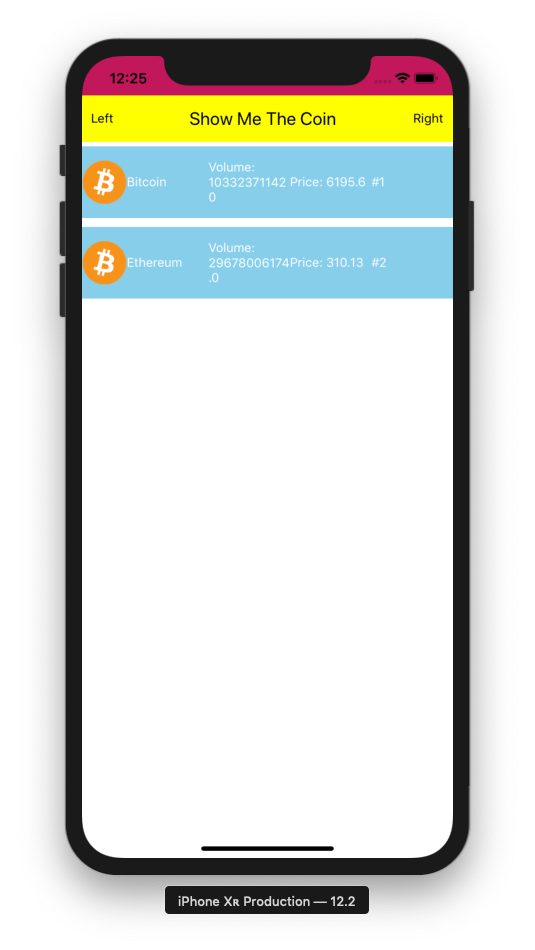
9. It's Real Data.
screens/CoinView.js
import React from 'react';
import { StyleSheet, Text, View } from 'react-native';
import CoinItem from '../components/CoinItem';

class CoinView extends React.Component {
  constructor(props) {
    super(props);
    this.state = {
      coinDatas: [],
      isLoading: false,
    };

    // TODO: Toggle the state every second

  }

  componentDidMount() { // After component mounted
    this._getCoinDatas(10);

    setInterval(() => {
      this._getCoinDatas(10);
      console.log('toggled!');
    }, 10000);
  }

  _getCoinDatas = async (limit) => {
    this.setState({
      isLoading: true,
    });

    try {
      const response = await fetch(`https://api.coinmarketcap.com/v1/ticker/?limit=${limit}`);
      const responseJson = await response.json();
      await this.setState({
        coinDatas: responseJson,
        isLoading: false,
      });
    } catch(error) {
      console.error('_getCoinDatas', error);
    }
  }

  render () {
    let coinItems = this.state.coinDatas.map( (data, index) => {
      const {rank, name, price_usd, market_cap_usd, last_updated} = data; // Destructuring
      return (
        <CoinItem
          key={index}
          rank={rank}
          name={name}
          price={price_usd}
          volumn={market_cap_usd}
        />
      );
    });

    return (
      <View style={this.props.style}>
        {coinItems}
      </View>
    )
  }
}

export default CoinView;
Run
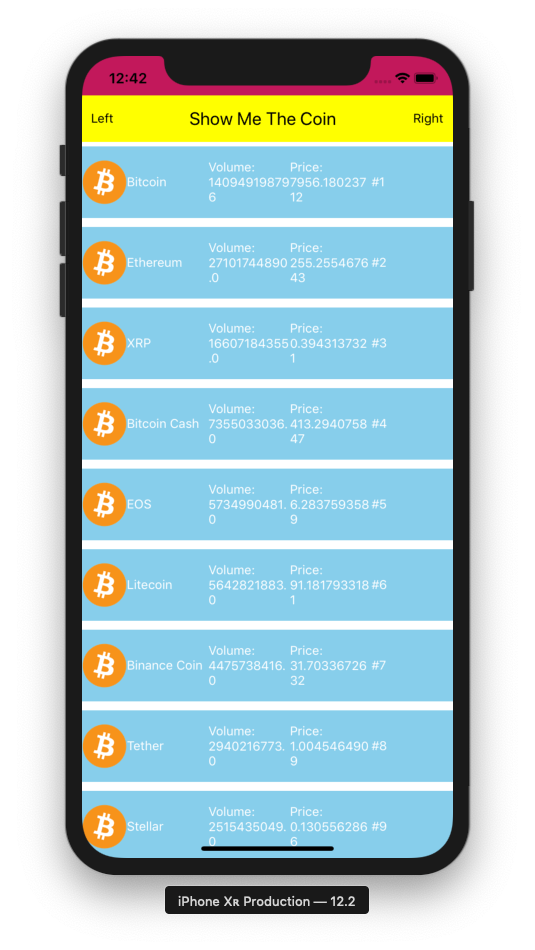
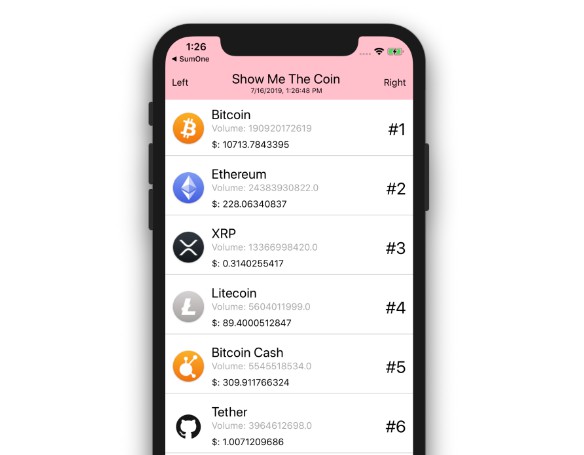
10. Upgrade TopBar
Communication between parent and child components
- Add refresh date information on
TopBar - Sequence of
refreshDate's data flow:
CoinView.js->App.js->TopBar.js
screens/CoinView.js
  _getCoinDatas = async (limit) => {
    this.setState({
      isLoading: true,
    });

    try {
      const response = await fetch(`https://api.coinmarketcap.com/v1/ticker/?limit=${limit}`);
      const responseJson = await response.json();

      const date = new Date();
      const now = date.toLocaleString()

      if (this.props.refreshDate != null) {
        this.props.refreshDate(now); // Run func type props
      }

      await this.setState({
        coinDatas: responseJson,
        isLoading: false,
      });

    } catch(error) {
      console.error('_getCoinDatas', error);
    }
  }
Add state, _setRefreshDate ....
App.js
import React from 'react';
import { StyleSheet, Text, View } from 'react-native';
import { Constants } from 'expo';
import CoinView from './screens/CoinView';
import TopBar from './components/TopBar';

export default class App extends React.Component {
  constructor(props) {
    super(props);
    this.state = {
      refreshDate: '-',
    }
  }

  _setRefreshDate = (date) => { // Called from CoinView's prop
    console.log('Updated: '+ date);
    this.setState({
      refreshDate: date,
    });
  }

  render() {
    return (
      <View style={styles.container}>
        <View style={styles.statusBar} />
        <TopBar title="Show Me The Coin" refreshDate={this.state.refreshDate} />
        <CoinView
          refreshDate={this._setRefreshDate}
          style={styles.coinView}
        />
      </View>
    );
  }
}

const styles = StyleSheet.create({
  statusBar: {
    backgroundColor: '#C2185B',
    height: Constants.statusBarHeight
  },
  container: {
    flex: 1
  },
  coinView: {
    width: '100%',
    flex: 1,
    flexDirection: 'column', // row
    backgroundColor: 'white',
    alignItems: 'center',
    justifyContent: 'flex-start' // center, space-around
  }
});
components/TopBar.js
Add refreshDate property.
  render() {
    return (
      <View style={styles.container}>
        <Text>Left</Text>
        <View>
          <Text style={{ fontSize: 20 }}>{this.props.title}</Text>
          <Text style={{ fontSize: 10, textAlign: 'center' }}>{this.props.refreshDate || '-'}</Text>
        </View>
        <Text>Right</Text>
      </View>
    );
  }
Result
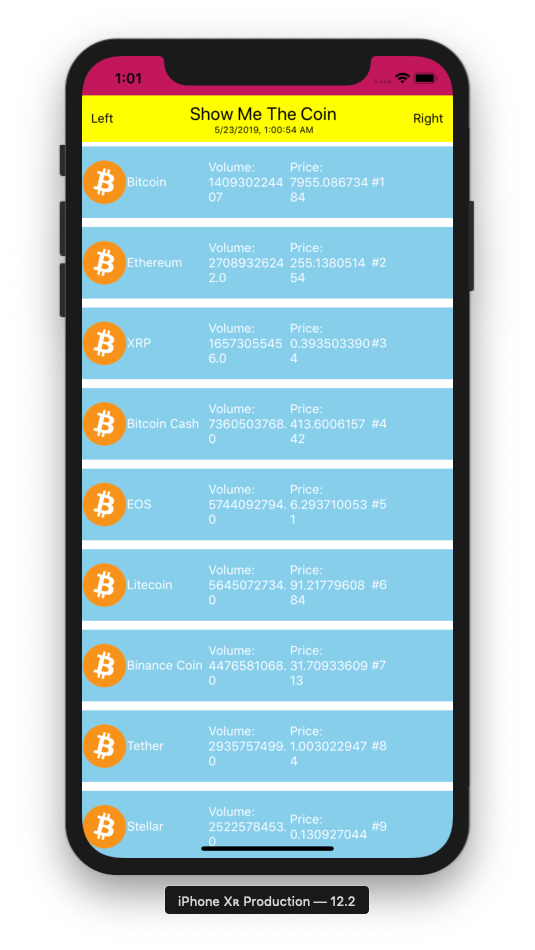
11. ScrollView. Another Component
Super easy!
- Replace
ViewwithScrollView - Remove
justifyContentandalignItemsfrom CoinView.js's style. (ScrollView dose not have fixed size).
screens/CoinView.js
...
import { StyleSheet, Text, View, ScrollView } from 'react-native';

...

return (
  <ScrollView style={this.props.style}>
    {coinItems}
  </ScrollView>
)

...
App.js
in Style
coinView: {
  width: '100%',
  flex: 1,
  flexDirection: 'column', // row
  backgroundColor: 'white',
  // alignItems: 'center',
  // justifyContent: 'flex-start' // center, space-around
}
13. Change each icon of coins
Let's make look and feel for your application using icon of coins.
libs/Constants.js
Make function to get icon uri from name of coin.
/**
  Icons from: https://github.com/cjdowner/cryptocurrency-icons/tree/master/32%402x/icon
*/
export function getCoinIconUri(coinName) {
  switch (coinName) {
    case 'Bitcoin':
      return 'https://github.com/cjdowner/cryptocurrency-icons/blob/master/32@2x/icon/[email protected]?raw=true';

    case 'Ethereum':
      return 'https://github.com/cjdowner/cryptocurrency-icons/blob/master/32@2x/icon/[email protected]?raw=true';

    case 'XRP':
      return 'https://github.com/cjdowner/cryptocurrency-icons/blob/master/32@2x/icon/[email protected]?raw=true';

    case 'EOS':
        return 'https://github.com/cjdowner/cryptocurrency-icons/blob/master/32@2x/icon/[email protected]?raw=true';

    case 'Bitcoin Cash':
      return 'https://github.com/cjdowner/cryptocurrency-icons/blob/master/32@2x/icon/[email protected]?raw=true';

    case 'Litecoin':
      return 'https://github.com/cjdowner/cryptocurrency-icons/blob/master/32@2x/icon/[email protected]?raw=true';

    default:
      return 'https://github.githubassets.com/images/modules/logos_page/GitHub-Mark.png';
  }
}
components/CoinItem.js
Ready to get iconUri from props.
...

<Image
style={{width: 50, height: 50, marginRight: 5, marginLeft: 5}}
source={{uri: this.props.iconUri}}
/>

...
screens/CoinView.js
Add iconUri={getCoinIconUri(name)} to the CoinItem child component.
...

import { getCoinIconUri } from '../libs/Constants';

...

render () {
  let detailCells = this.state.coinDatas.map( (data, index) => {
    const {rank, name, price_usd, market_cap_usd, last_updated} = data; // Destructuring
    return (
      <CoinItem
        key={index}
        rank={rank}
        name={name}
        price={price_usd}
        volumn={market_cap_usd}
        iconUri={getCoinIconUri(name)}
      />
    );
  });

  return (
    <ScrollView style={this.props.style}>
      {detailCells}
    </ScrollView>
  )
}
Refresh and check your icons!
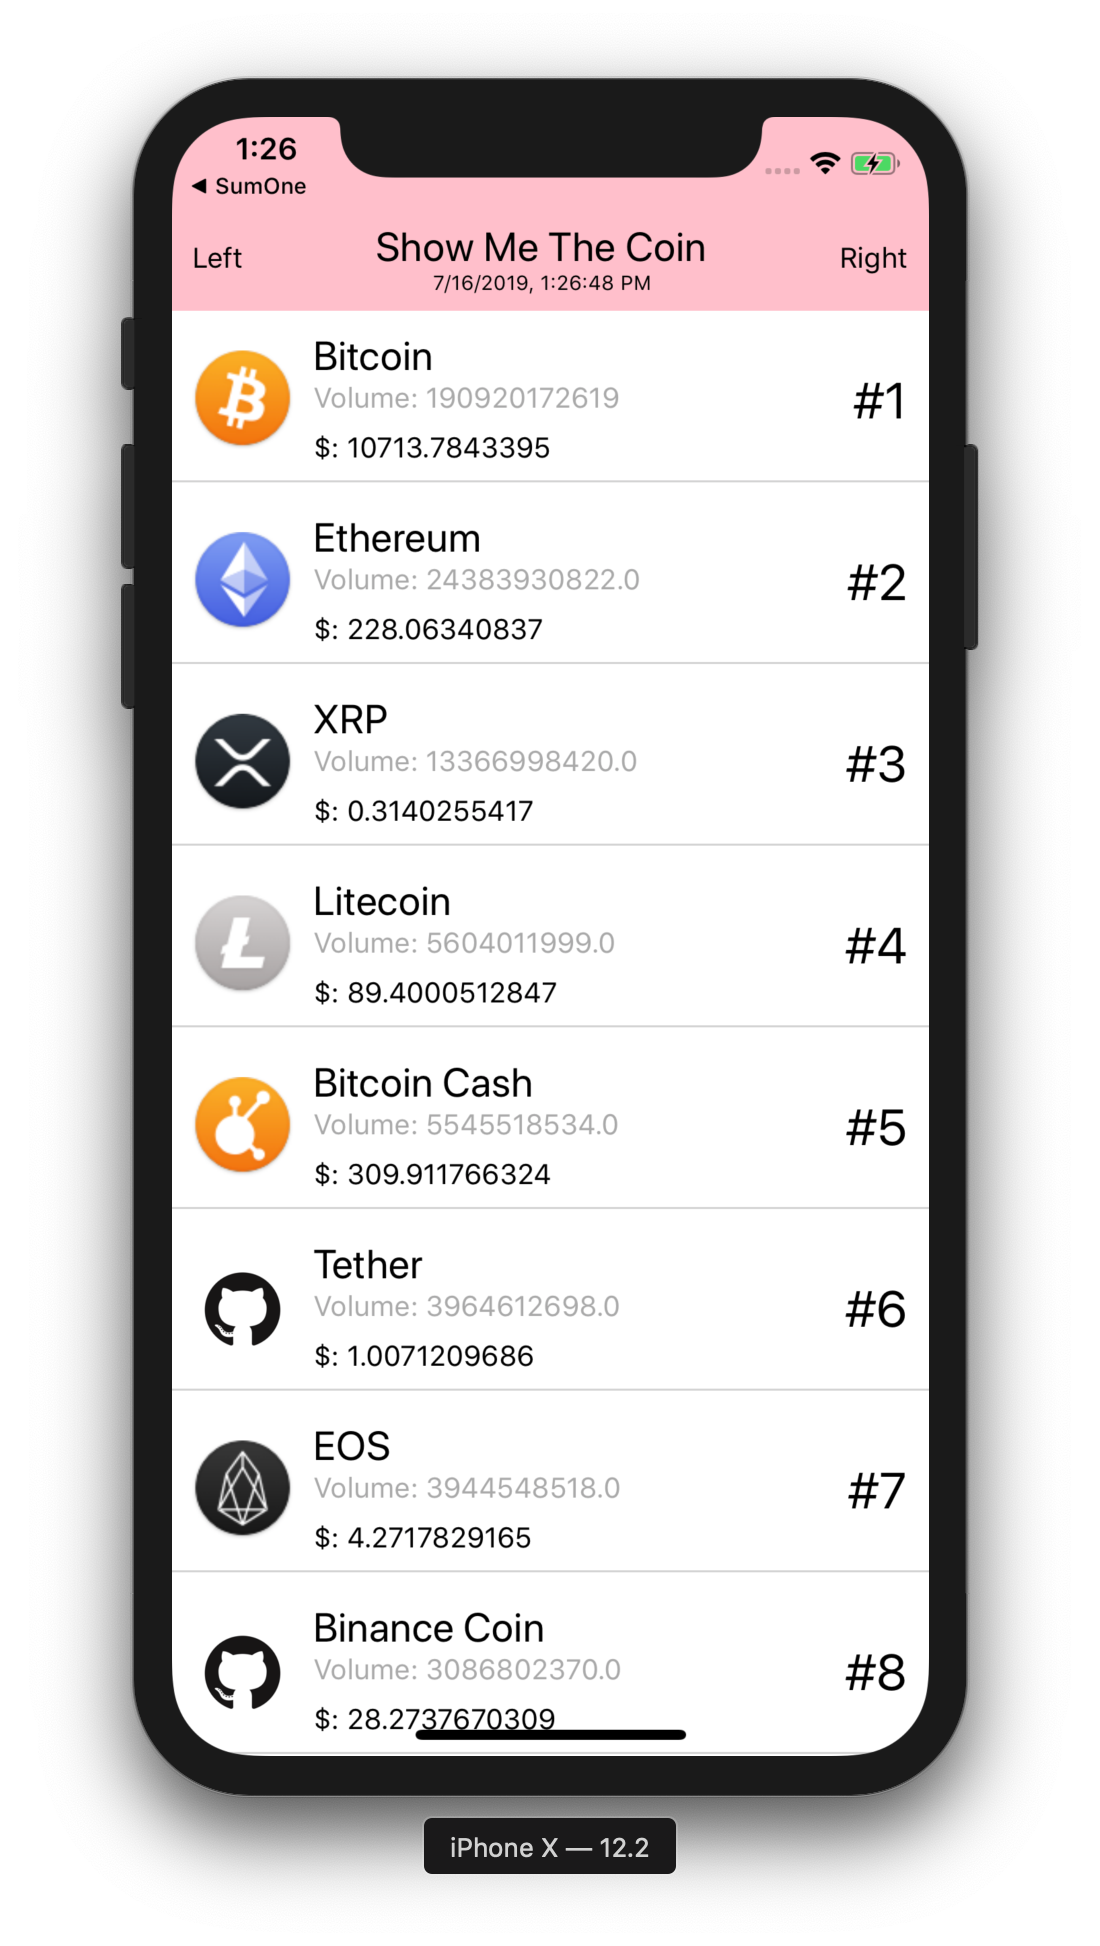
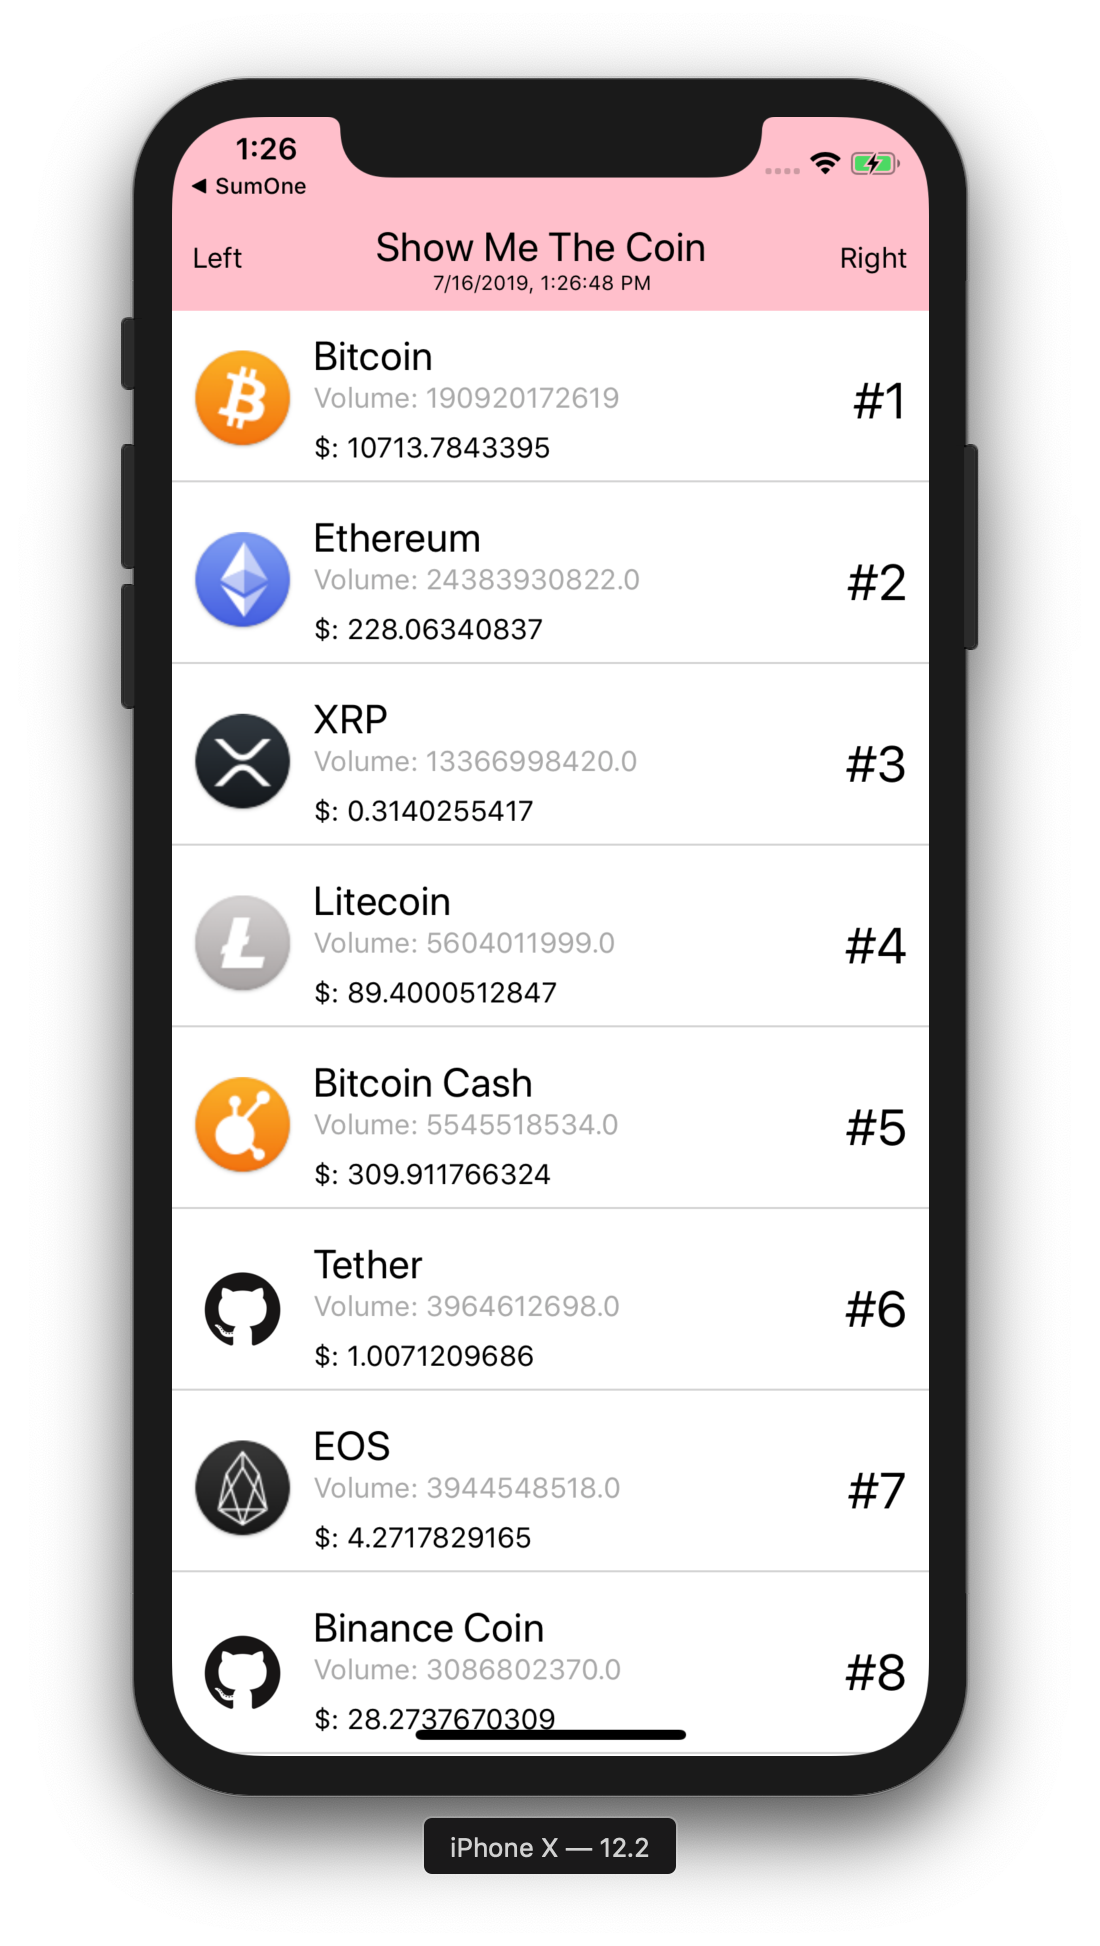
12. Oh, Beauty
It is your turn.
- Change the style better
components/CoinItem.js
import React from 'react';
import { StyleSheet, Text, View, Image } from 'react-native';

class CoinItem extends React.Component {
  render() {
    let date = new Date();
    let now = date.toLocaleString();

    return (
      <View style={styles.container}>
        <Image
          style={{ width: 50, height: 50, margin: 10 }}
          source={{ uri: this.props.iconUri }}
        />
        <View style={{ flex: 1, flexDirection: 'row', alignSelf: 'stretch', alignItems: 'center', justifyContent: 'space-between' }}>
          <View>
            <Text style={[styles.text, { flex: 1, fontSize: 20, marginTop: 5 }]}>{this.props.name || 'Name'}</Text>
            <Text style={[styles.text, { flex: 1, color: 'darkgrey' }]}>{'Volume: ' + (this.props.volumn || 0)}</Text>
            <Text style={[styles.text, { flex: 1 }]}>{'$: ' + (this.props.price || 0)}</Text>
          </View>
          <Text style={[styles.text, { fontSize: 25, marginRight: 10 }]}>{'#' + (this.props.rank || 'Rank')}</Text>
        </View>
      </View>
    );
  }
}

const styles = StyleSheet.create({
  container: {
    width: '100%',
    height: 80,
    flexDirection: 'row', // row
    backgroundColor: 'white',
    alignItems: 'center',
    // justifyContent: 'space-around', // center, space-around
    marginTop: 5,
    marginBottom: 5,
    borderBottomWidth: 1,
    borderBottomColor: 'lightgrey',
  },
  text: {
    color: 'black',
  },
});

export default CoinItem;
It will be better to move each styles into the StyleSheet.
13. Use Flatlist instead of 'ScrollView'
screens/CoinView.js
...
_renderItem = ({item}) => {
    const {rank, name, price_usd, market_cap_usd, last_updated} = item; // Destructuring
    return (
      <CoinItem
        rank={rank}
        name={name}
        price={price_usd}
        volumn={market_cap_usd}
        iconUri={getCoinIconUri(name)}
      />
    );
  }

  render () { // Do not forget import FlatList
    return (
      <FlatList
        data={this.state.coinDatas}
        keyExtractor={(item) => item.name}
        renderItem={this._renderItem}
      />
    )
  }
...
14. Pull to refresh
screens/CoinView.js
  componentDidMount() { // After component mounted
    this._getCoinDatas(10);

    // setInterval(() => {
    //   this._getCoinDatas(10);
    //   console.log('toggled!');
    // }, 10000);
  }
  render () {
    return (
      <FlatList
        data={this.state.coinDatas}
        keyExtractor={(item) => item.name}
        renderItem={this._renderItem}
        refreshing={this.state.isLoading}
        onRefresh={this._getCoinDatas}
      />
    )
  }
15. Router(react-navigation)
We will use one of the most popular router libraries. react-navigation
yarn add [email protected]
expo install react-native-gesture-handler
expo install react-native-reanimated
Copy source code from App.js to screens/Home.js. And arrange import as below
import React from 'react';
import { StyleSheet, Text, View } from 'react-native';
import Constants from 'expo-constants';
import CoinView from './CoinView';
import TopBar from '../components/TopBar';

export default class Home extends React.Component {
…
}
StackNavigator
App.js
import React from 'react'
import { View, Text } from 'react-native'
import { createStackNavigator, createAppContainer } from 'react-navigation';

import Home from './screens/Home'

const MainStack = createStackNavigator({
  Home: {
    screen: Home,
  }
})

const AppContainer = createAppContainer(MainStack)

const App = () => {
  return (
    <AppContainer />
  )
}

export default App
Makeup Header
App.js
import Home from './screens/Home'

const Header = (props) => {
  return (
    <View style={{ flex: 1, alignItems: 'center' }}>
      <Text style={{ fontSize: 18 }}>{props.title}</Text>
      <Text style={{ fontSize: 13, color: 'gray' }}>{props.subtitle}</Text>
    </View>
  )
}

const MainStack = createStackNavigator({
  Home: {
    screen: Home,
    navigationOptions: ({navigation}) => {
      return {
        headerTitle: (
          <Header
            title={'Show Me The Coin'}
            subtitle={navigation.getParam('refreshDate', '-')}
          />
        ),
        headerStyle: {
          backgroundColor: 'pink',
        },
      }
    },
  }
})
Home.js
export default class Home extends React.Component {
  constructor(props) {
    super(props);
  }

  _setRefreshDate = (date) => { // Called from CoinView's prop
    console.log('Updated: '+ date);
    if (this.props.navigation) {
      this.props.navigation.setParams({refreshDate: date});
    }
  }

  render() {
    return (
      <View style={styles.container}>
        <CoinView
          refreshDate={this._setRefreshDate}
          style={styles.coinView}
        />
      </View>
    );
  }
}
Detail Screen
Install react-native-webview
yarn add react-native-webview
screens/Youtube.js
import * as React from 'react';
import { WebView } from 'react-native-webview';

export default class Youtube extends React.Component {
  render() {
    return (
        <WebView
            source={{ uri:'https://youtu.be/ar9PuUCvvCw' }}
            style={{ marginTop: 20 }}
        />
    )
  }
}
App.js
const MainStack = createStackNavigator({
  Home: {
    screen: Home,
    navigationOptions: ({navigation}) => {
      ...
    }
  },
  Youtube: {
    screen: Youtube,
    navigationOptions: ({navigation}) => {
      return {
        title: navigation.getParam('title', 'YOUTUBE'),
      }
    }
  }
}, {
  initialRouteName: 'Youtube',
})
Clickable List
screens/CoinView.js
replace existing renderItem
import { TouchableOpacity } from ‘react-native';

. . .

  _renderItem = ({item}) => {
    const {rank, name, price_usd, market_cap_usd, last_updated} = item;
    return (
      <TouchableOpacity
       onPress={() => this.props.navigation &&
        this.props.navigation.push('Youtube', {title: name})}
      >
        <CoinItem
          rank={rank}
          name={name}
          price={price_usd}
          volumn={market_cap_usd}
          iconUri={getCoinIconUri(name)}
        />
      </TouchableOpacity>
    );
  }
Pass Navigation props
screens/Home.js
  render() {
    return (
      <View style={styles.container}>
        <CoinView
          navigation={this.props.navigation}
          refreshDate={this._setRefreshDate}
          style={styles.coinView}
        />
      </View>
    );
  }
Convert to Youtube address from coin name
You can use any web address you want.
libs/Constants.js
export function getCoinYoutubeUrl(coinName) {
  switch (coinName) {
    case 'Bitcoin':
      return 'https://youtu.be/ar9PuUCvvCw';

    case 'Ethereum':
      return 'https://youtu.be/ar9PuUCvvCw';

    case 'XRP':
      return 'https://youtu.be/ar9PuUCvvCw';

    case 'EOS':
        return 'https://youtu.be/ar9PuUCvvCw';

    default:
      return 'https://youtu.be/ar9PuUCvvCw';
  }
}
screens/Youtube.js
import * as React from 'react';
import { WebView } from 'react-native-webview';
import { getCoinYoutubeUrl } from '../libs/Constants';

export default class Youtube extends React.Component {
  render() {
    const title = this.props.navigation.getParam('title', '');
    const uri = getCoinYoutubeUrl(title);
    return (
        <WebView
            source={{ uri: uri }}
            style={{ marginTop: 20 }}
        />
    )
  }
}
Change header style
screens/App.js
...

onst MainStack = createStackNavigator({
  Home: {
    screen: Home,
    navigationOptions: ({navigation}) => {
      return {
        headerTitle: (
          <Header
            title={'Show Me The Coin'}
            subtitle={navigation.getParam('refreshDate', '-')}
          />
        ),
        headerStyle: {
          backgroundColor: 'pink',
        },
      }
    },
  },
  Youtube: {
    screen: Youtube,
    navigationOptions: ({navigation}) => {
      return {
        title: navigation.getParam('title', 'YOUTUBE'),
      }
    }
  }
}, {
  defaultNavigationOptions: {
    headerStyle: {
      backgroundColor: 'pink',
    }
  }
  // initialRouteName: 'Youtube',
})

...
What’s Next
- [x] Apply
Flatlistinstead ofScrollView - [x] Pull to refresh
- [x] Apply Router(react-navigation) with detail screen
- [x] Show more
Detail Pagewhen clicked each rows
- [x] Show more
- [ ] Use state management as
Context - [ ] Make release version for application store from
Expoor export fromExpo
