react-native-component-viewer
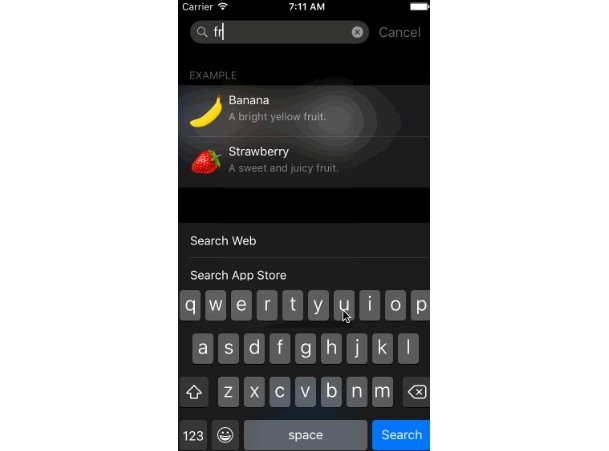
A searchable list of components or scenes in your app. Handy for tweaking layout or design without needing to navigate your app to get there.
Especially useful for accessing screens that are hard to get to, or for testing the design of screen in specific difficult-to-test situations (e.g. server failure).
Requires react-native >= 0.43.0. For older versions of RN, please use version 0.4.0 or below.
Installation
This is a pure JavaScript library, so there's no need to run react-native link or manually add any frameworks or libraries.
npm i -S react-native-component-viewer
- You may need to close and restart the React Native packager.
Usage
This library does not assume any specific navigation library is in use. As a result it can be configured for us with react-navigation, react-native-router-flux, and others.
Usage in react-native-router-flux
Here's how to use it in react-native-router-flux:
- First, add the
ComponentViewercomponent to your list of scenes at the root of your app:
import {ComponentViewer} from 'react-native-component-viewer';

//.. other imports

class MyRootComponent extends React.Component {
  render() {
    return <Scene key="MyRootScene">
      {/* Insert line below.. */}
      <Scene key="ComponentViewer" hideNavBar={true} component={ComponentViewer}/>
    </Scene>
  }
}
- Then, at the point you want to show the debug list UI (e.g. if your in-app settings), call
Actions.ComponentViewer({onClose: Actions.pop}).
The onClose prop above runs the function that closes the list UI when the Done button is pressed on the UI.
Example:
<TouchableHighlight onPress={()=>Actions.ComponentViewer({onClose: Actions.pop})}>
    <Text>Click to view scenes</Text>
</TouchableHighlight>
When you first run this you'll get an empty list. You need to manually register each screen with the system (along with their test prop data) before you can start.
Other navigation systems will be similar - just make sure to pass a function that closes the list as the
onCloseproperty of the<ComponentViewer>component. This'll ensure theDonebutton on the list
returns to your previous page.
Registering test screens
On each screen you want to test, add the following:
import {addSceneTest} from 'react-native-component-viewer'; // <-- Add this import

class MySceneComponent extends React.Component {
  //... your scene component here
}

// Add a test scene.
addTestScene(<MySceneComponent
  myProp1={'test data'}
  myProp2={['more','test','data']}
/>,
{name: 'MySceneComponent'},
);
You can add the same component several times with different data. To do this, add a title property to the the second parameter to addTestScene:
addSceneTest(<MySceneComponent items={[]}/>, {name: 'MySceneComponent', title: 'Empty'});

addSceneTest(<MySceneComponent items={['more','test','data']}/>, {name: 'MySceneComponent', title: 'Three items'});
The component parameter
When you add a scene or component test, you can either pass in a rendered component, like either of the following:
addSceneTest(<MySceneComponent />, {name: 'MySceneComponent'});
addComponentTest(<MyComponent />, {name: 'MyComponent'});
or you can pass in an unrendered component, which Component Viewer will render for you. For example, with functional components:
addSceneTest(({closeThisTest}) => <MySceneComponent onClose={closeThisTest} />, {name: 'MySceneComponent'});
addComponentTest(({closeThisTest}) => <MyComponent onClose={closeThisTest} />, {name: 'MyComponent'});
If you pass in an anonymous functional component, you should always supply an explicit name option as above, because Component Viewer will not be able to reliably find out the name of your component.
If you pass in an unrendered component, Component Viewer will render it with the following props:
- closeThisTest: a 0-argument function; when called it closes the current test.
Note that the list of props that Component Viewer will supply to components may be added to in future, so it's best to use a functional component that explicitly picks out the ones you want to use.
Making space for header and footer bars
In real app, your screens will normally have a header (and perhaps a footer). This means your actual component has a smaller space to render in.
To support this there's an optional property wrapperStyle on the second parameter to addSceneTest. This is a standard React Native View style.
Use the padding properties to adjust the rendering inset to your scene. You may want to store the style somewhere central in your app so
you don't have to type it out each time you use addTestScene.
Example:
addSceneTest(<MySceneComponent items={['more','test','data']}/>,
{
  name: 'MySceneComponent',
  title: 'Three items',
  wrapperStyle: {paddingTop: 44, backgroundColor: 'black'}),
}
Testing modals
If you are testing a component with a <Modal> on it, the modal may cover the 'Close' button and make it impossible to go back to the list. If your modal has its own close button then you can work around this by:
- registering your modal as a scene using addSceneTest, and
- calling the
closeThisTestcallback from your modal's close button.
For example, if you write:
import React from 'react';
import {addSceneTest} from 'react-native-component-viewer';
import {Modal, Text, View, Button} from 'react-native';

const MyModal = ({onRequestClose, visible}) => ```
  <Modal visible={visible} onRequestClose={onRequestClose}>
    <View style={{flex: 1, justifyContent: 'center', alignItems: 'center', backgroundColor: '#fff'}}>
      <Text>This is a modal pop-up!</Text>
      <Button title="Close this modal" onPress={onRequestClose} />
    </View>
  </Modal>
);

addSceneTest(({closeThisTest}) => <MyModal onRequestClose={closeThisTest} visible />, {
  name: 'MyModal',
});
then the 'Close this modal' button inside the modal will take you back to the menu.
Registering Test Components
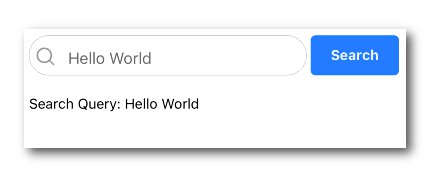
When testing a component such as a Button, you'll most likely want to view all the possible states of the button on a single screen
For example:

To do this use the addComponentTest method.
For example:
import {addComponentTest} from 'react-native-component-viewer'; // <-- Add this import

// add tests
const wrapperStyle = {width: 200}; // style of container holding the component - useful for constraining to different sizes
addComponentTest(
      <Button type={'large'} title={'Button title'} />,
      {
       name: 'Button',
       title: 'Large button',
	    wrapperStyle,
	   }
    )
Multiple tests for a single component appear in the ComponentViewer list as a single entry. Tapping the entry displays a ScrollView containing all your tests.
Usage with Redux
If you're using the react-redux connect method, make sure you pass the 'unconnected' version of the component to addTestScene, e.g.:
class MyComponent extends React.Component {
	//...
}

export default connect(
	state => ({
		//.. mapStateToProps
	}),
	dispatch => ({
		//.. mapDispatchToProps
	}))(MyComponent);

// we export the connected component, but pass the
// unconnected component to addTestScene
addTestScene(<MyComponent {...testData}/>);
This way you can make sure your test scenes are completely independent of the Redux state.