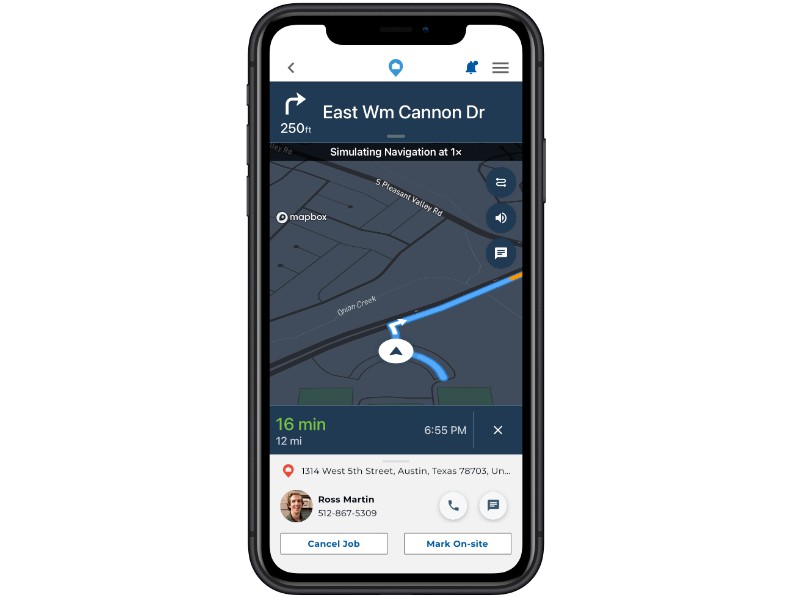
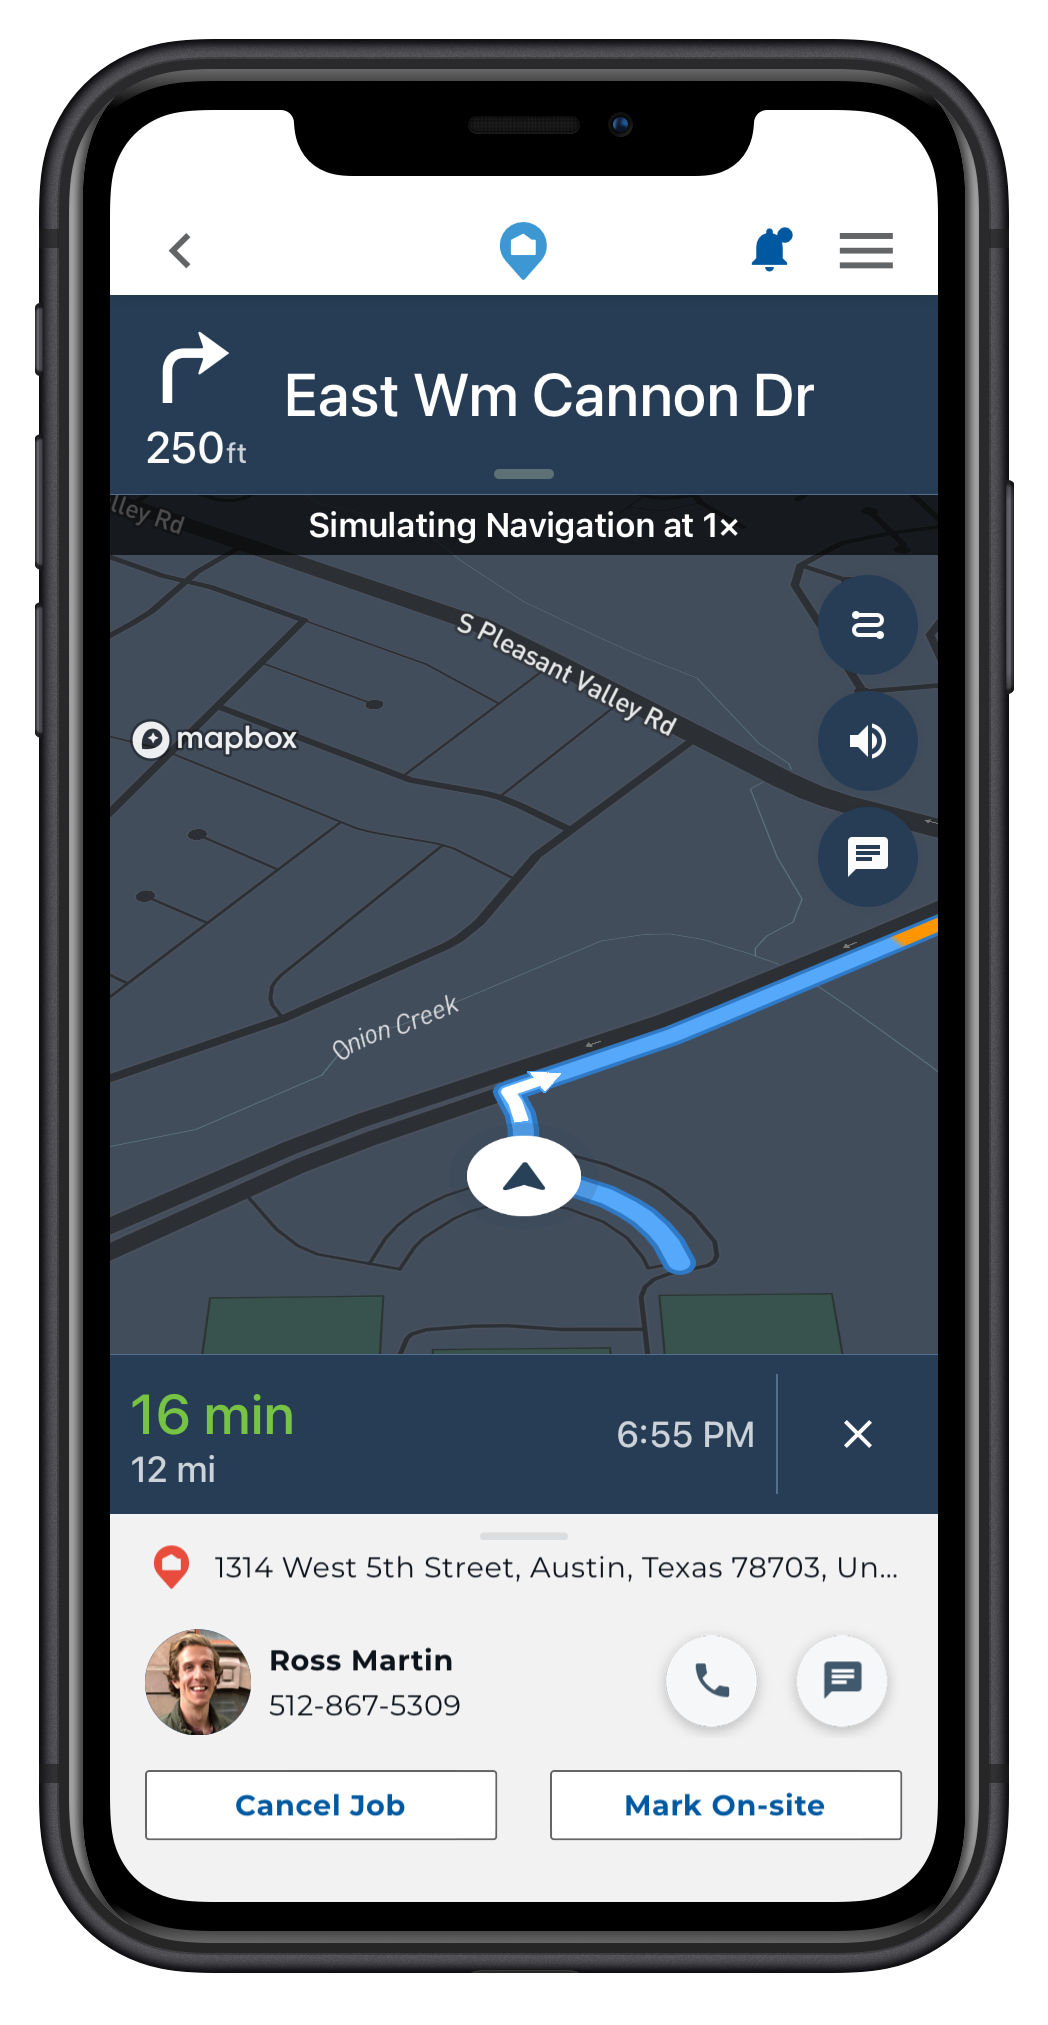
React Native Mapbox Navigation
A navigation UI ready to drop into your React Native application.
Features
- A full-fledged turn-by-turn navigation UI for iPhone, iPad, and CarPlay that’s ready to drop into your application
- Professionally designed map styles for daytime and nighttime driving
- Worldwide driving, cycling, and walking directions powered by open data and user feedback
- Traffic avoidance and proactive rerouting based on current conditions in over 55 countries
- Natural-sounding turn instructions powered by Amazon Polly (no configuration needed)
- Support for over two dozen languages
Installation Requirements
Before installing the SDK, you will need to gather the appropriate credentials. The SDK requires two pieces of sensitive information from your Mapbox account. If you don't have a Mapbox account: sign up and navigate to your Account page. You'll need:
- A public access token: From your account's tokens page, you can either copy your default public token or click the Create a token button to create a new public token.
- A secret access token with the
Downloads:Readscope.
- From your account's tokens page, click the Create a token button.
- From the token creation page, give your token a name and make sure the box next to the
Downloads:Readscope is checked. - Click the Create token button at the bottom of the page to create your token.
- The token you've created is a secret token, which means you will only have one opportunity to copy it somewhere secure.
Installation
npm install @homee/react-native-mapbox-navigation
Read the iOS specific instructions below before running pod install.
iOS Specific Instructions
Make sure your react native project has an Objective-C bridging header for swift. If you don't have a bridging header you can follow these steps here below in the dropdown.
Create an Objective-C bridging header
- From Xcode, go to:
File → New → File… - Select Swift File
- Name your file Dummy or whatever you want
- In the Group dropdown, make sure to select the group folder for your app, not the project itself.
After you create the Swift file, you should be prompted to choose if you want to configure an Objective-C Bridging Header. Select “Create Bridging Header”.

This file is usually named YourProject-Bridging-Header.h. Don’t change this name manually, because Xcode configures the project with this exact filename.
Place your secret token in a .netrc file in your home directory that contains this:
machine api.mapbox.com
login mapbox
password <INSERT SECRET TOKEN>
Place your public token in your project's Info.plist and and add a MGLMapboxAccessToken key whose value is your public access token.
Now you are ready to install the cocoapod:
cd ios && pod install
If you are experiencing a "multiple commands produce" build error in your Xcode project then you will need to add this entry below to the top of your ios podfile:
install! 'cocoapods', :disable_input_output_paths => true
For more information you can read the docs provided by Mapbox.
Android Specific Instructions
Place your secret token in your android app's top level gradle.properties file:
MAPBOX_DOWNLOADS_TOKEN=SECRET_TOKEN_HERE
Open up your project-level build.gradle file. Declare the Mapbox Downloads API's releases/maven endpoint in the repositories block.
allprojects {
    repositories {
        maven {
            url 'https://api.mapbox.com/downloads/v2/releases/maven'
            authentication {
                basic(BasicAuthentication)
            }
            credentials {
                // Do not change the username below.
                // This should always be `mapbox` (not your username).
                username = "mapbox"
                // Use the secret token you stored in gradle.properties as the password
                password = project.properties['MAPBOX_DOWNLOADS_TOKEN'] ?: ""
            }
        }
    }
}
Place your public token in your project's android/app/src/main/AndroidManifest.xml
<!-- This should be a child of the application tag -->
<meta-data android:name="MAPBOX_ACCESS_TOKEN"
    android:value="PUBLIC_TOKEN_HERE" />
For more information you can read the docs provided by Mapbox.
Usage
import * as React from 'react';
import { StyleSheet, View } from 'react-native';
import MapboxNavigation from '@homee/react-native-mapbox-navigation';

export const SomeComponent = () => {
  return (
    <View style={styles.container}>
      <MapboxNavigation
        origin={[-97.760288, 30.273566]}
        destination={[-97.918842, 30.494466]}
        shouldSimulateRoute={true}
        onLocationChange={(event) => {
          const { latitude, longitude } = event.nativeEvent;
        }}
        onRouteProgressChange={(event) => {
          const {
            distanceTraveled,
            durationRemaining,
            fractionTraveled,
            distanceRemaining,
          } = event.nativeEvent;
        }}
        onError={(event) => {
          const { message } = event.nativeEvent;
        }}
        onCancelNavigation={() => {
          // User tapped the "X" cancel button in the nav UI
          // or canceled via the OS system tray on android.
          // Do whatever you need to here.
        }}
        onArrive={() => {
          // Called when you arrive at the destination.
        }}
      />
    </View>
  );
};

const styles = StyleSheet.create({
  container: {
    flex: 1,
  },
});
MapboxNavigation Props
origin (Required)
Array that contains the longitude and latitude for the starting point.
[$longitude, $latitude]
destination (Required)
Array that contains the longitude and latitude for the destination point.
[$longitude, $latitude]
shouldSimulateRoute
Boolean that controls route simulation. Set this as true to auto navigate which is useful for testing or demo purposes. Defaults to false.
onLocationChange
Function that is called frequently during route navigation. It receives latitude and longitude as parameters that represent the current location during navigation.
onRouteProgressChange
Function that is called frequently during route navigation. It receives distanceTraveled, durationRemaining, fractionTraveled, and distanceRemaining as parameters.
onError
Function that is called whenever an error occurs. It receives a message parameter that describes the error that occurred.
onCancelNavigation
Function that is called whenever a user cancels navigation.
onArrive
Function that is called when you arrive at the provided destination.